The Tale of the Platform Bed
When I was getting things ready to move out of our house in March this year, I went crazy getting rid of stuff because I knew that what we kept would need to fit in a storage unit for a while. In the process I ended up selling, or donating a lot of useful things. My mom was helping me and warned me not to get rid of some of the more useful things, but I didn't listen. Mom you were right, I hope you are happy.
Among those things was our bed frame and very old mattress and box spring. I wasn't sad to see the mattress go, but I kind of wondered about the bed frame, for a split second, before I practically gave it away.
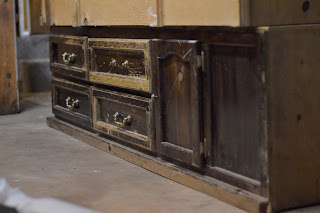
Fast forward to last week and we are sleeping on an inch of memory foam on the floor in our new house, I was desperate for a mattress after one night on that thing. I knew though, that along with a mattress we would need soemthing to put it on, so I took it upon myself to find one for free. I got on KSL (basically the same as Craigslist for Utah) and found this:
Corby and I had discussed beds and we both liked the idea of having storage underneath. When I saw this pop up I knew I had to snatch it. It was obviously old and the original finish had obviously come off in a few places. I figured it would be quick and easy to just sand it down and paint it. So I went and got it, the person giving it away helped get it into the truck, but I got them into my garage by myself....not to brag or anything. Ok, I used a rolly cart.

Of course the first thing to do was to remove all the hardware and put it somewhere safe. As I did this I found some damages that were not terrible, but could become an issue over time. They were all pretty minor though and I could easily fix them with the staple gun I had on hand.

I also found this spot that left quite a gap, in the photo to the right you can see my solution was to mix some wood glue with sawdust and fill the gap. once it was painted it looked fine.
I then sanded the whole thing down. I just used the palm sander and sandpaper I had gotten at the dollar store. The problem with that paper is that it was really brittle and kept breaking off, so I decided that the main goal was to just get the surface rough enough so the paint had something to grab onto, and not to strip off all the finish.
After that, I used some old socks to wipe everything down and get the sawdust off the surfaces I was going to paint, and then I painted! I didn't worry about surfaces you wouldn't see when the drawers were in. I'm lazy that way.

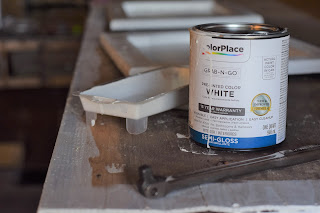
I got all my paint supplies from Walmart, I found a small roller kit with these awesome foam rollers I had never seen before. It spread the paint so smoothly it was amazing! I got the quart size can and even with about 4 coats on everything, I still had paint in the can. This dried fairly quickly in my hot garage which is great because I hate waiting for paint to dry.

I then looked up the size of the bed (we like a queen size) and with 25 inches of dresser/base sitting back to back we still had a gap in the middle. So we went to home depot and got some plywood and some wood for support. I just had the employees at Home depot cut my plywood to the size I needed because at this point we have one saw and it certainly wouldn't cut nice and straight all the way down. As it turned out a customer drove their motorized wheelchair though my wood and I got just what I needed and it was free. I was very happy.


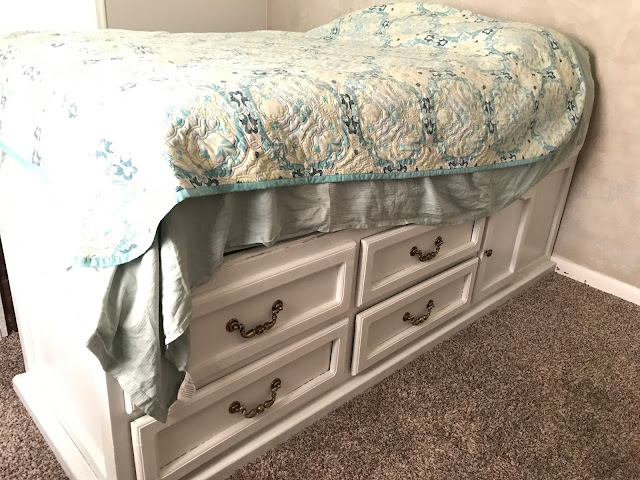
All we had to do was screw the support wood onto either side and put the plywood in between and we had our platform bed! I was happy with it.... until we put the mattress on.
It turns out that the mattress and the bed frame were both taller than average. I did not realize this until we put one on top of the other and it came up almost to my belly button. I am about 5'7".
I do like how it looks though, and I am getting used to the height. My husband likes it, and it cost us only $15.47 for the whole thing.
Price Breakdown:
Dresser things: free
Paint: $8.87
Paint roller: $2.27
Wood: $4.33
Sander/sandpaper: On hand
Total: $15.47
Among those things was our bed frame and very old mattress and box spring. I wasn't sad to see the mattress go, but I kind of wondered about the bed frame, for a split second, before I practically gave it away.
Fast forward to last week and we are sleeping on an inch of memory foam on the floor in our new house, I was desperate for a mattress after one night on that thing. I knew though, that along with a mattress we would need soemthing to put it on, so I took it upon myself to find one for free. I got on KSL (basically the same as Craigslist for Utah) and found this:
Corby and I had discussed beds and we both liked the idea of having storage underneath. When I saw this pop up I knew I had to snatch it. It was obviously old and the original finish had obviously come off in a few places. I figured it would be quick and easy to just sand it down and paint it. So I went and got it, the person giving it away helped get it into the truck, but I got them into my garage by myself....not to brag or anything. Ok, I used a rolly cart.

Of course the first thing to do was to remove all the hardware and put it somewhere safe. As I did this I found some damages that were not terrible, but could become an issue over time. They were all pretty minor though and I could easily fix them with the staple gun I had on hand.

I also found this spot that left quite a gap, in the photo to the right you can see my solution was to mix some wood glue with sawdust and fill the gap. once it was painted it looked fine.
I then sanded the whole thing down. I just used the palm sander and sandpaper I had gotten at the dollar store. The problem with that paper is that it was really brittle and kept breaking off, so I decided that the main goal was to just get the surface rough enough so the paint had something to grab onto, and not to strip off all the finish.
After that, I used some old socks to wipe everything down and get the sawdust off the surfaces I was going to paint, and then I painted! I didn't worry about surfaces you wouldn't see when the drawers were in. I'm lazy that way.

I got all my paint supplies from Walmart, I found a small roller kit with these awesome foam rollers I had never seen before. It spread the paint so smoothly it was amazing! I got the quart size can and even with about 4 coats on everything, I still had paint in the can. This dried fairly quickly in my hot garage which is great because I hate waiting for paint to dry.

I then looked up the size of the bed (we like a queen size) and with 25 inches of dresser/base sitting back to back we still had a gap in the middle. So we went to home depot and got some plywood and some wood for support. I just had the employees at Home depot cut my plywood to the size I needed because at this point we have one saw and it certainly wouldn't cut nice and straight all the way down. As it turned out a customer drove their motorized wheelchair though my wood and I got just what I needed and it was free. I was very happy.


All we had to do was screw the support wood onto either side and put the plywood in between and we had our platform bed! I was happy with it.... until we put the mattress on.
It turns out that the mattress and the bed frame were both taller than average. I did not realize this until we put one on top of the other and it came up almost to my belly button. I am about 5'7".
I do like how it looks though, and I am getting used to the height. My husband likes it, and it cost us only $15.47 for the whole thing.
Price Breakdown:
Dresser things: free
Paint: $8.87
Paint roller: $2.27
Wood: $4.33
Sander/sandpaper: On hand
Total: $15.47


Comments
Post a Comment